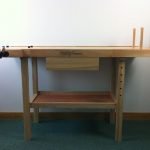
Woodworkers use a workbench, a specialized table upon which they perform all their woodworking tasks. Woodworking benches need to be heavy, sturdy, and with thick, strong wooden tabletops. An interesting fact is that they contain dog holes.
Why do woodworking benches have holes? It is an interesting question, and once you know the reason, you will want to ensure that your woodworking table has appropriate dog holes as well. Dog holes support “bench dogs” structures that hold wooden workpieces in position but without damaging the wood. Bench dogs can be made of wood, plastic, or metal.
Background

In quite a few, but not all scenarios, dog holes are a viable alternative for a vise. Originally, dog holes used to be square, but today most dog holes are round. A dog hole typically has a diameter of ¾” with a spacing of two to three inches from each other. The spacing will depend on the workbench dimensions and your specific requirements.
Workbenches differ according to the types of tasks and also according to personal preferences. Dog holes on a workbench will differ according to the structure and design of the workbench.
When you look at a workbench with dog holes, it may seem that they are randomly placed. But they are not – each one occupies a position with a specific purpose in mind.
The bench dogs that we fit into dog holes present a quick and easy means of holding a workpiece for performing various woodworking tasks on it. They serve as a vise when you need to clamp a workpiece using considerable force. Bench dogs can be made of metal and you can add springs and screws for height adjustment.
How to Use Dog Holes
It is quite easy to use dog holes and bench dogs. Place a bench dog in a dog hole and put your workpiece on the bench dog and secure it. Sometimes you may need to use a holdfast for extra grip. A holdfast is in effect a type of bench dog.
On placing the piece on the workbench, secure the bench dog onto the workpiece and complete your task. Once done, you can remove the bench dog using the release mechanism or, in some cases, simply slide the workpiece out of the bench dog.
Bench dogs are an intrinsic part of your workbench. You should consider making dedicated storage space for your bench dogs on the workbench. Installing a drawer on your workbench to store your bench dogs and associated accessories is a good idea.
When to Use Dog Holes
Many times, dog holes are the best thing to use for your carpentry tasks. Other times it is not appropriate. How do you know when and when not to use a bench dog?
Bench dogs do the work of a vise but you may not have one. In such a case, dog holes can help you rig up bench dog mechanisms to hold your job. If you have a vise or two to put on your workbench that you can easily dismantle after your job is done, you perhaps don’t need to drill dog holes in your workbench.
In the absence of a vise, dog holes and bench dogs create a viable, cost-effective, and space-saving alternative.
Well, that depends on the type of work you’re doing, and if you need a vise. With bench dogs, you can work with a vise when required. If you have a vice that you can dismantle, then you can put it into storage after use.
In the absence of a vise, a cost-effective solution is to use dog holes. It saves you a whole lot of money and space as well.
When You Need Dog Holes
You need dog holes if:
- You have a shortage of space in your woodworking shop.
- There are budgetary limitations for buying a vise.
- You don’t want to damage your work pieces.
- You need to do frequent clamping and unclamping to alter your work.
When You Don’t Need Dog Holes
You don’t need dog holes if:
- It’s not your workbench.
- You don’t want to deface your workbench with unsightly holes.
- You don’t have too many clamping jobs in your projects.
Adding Dog Holes to You Workbench
You might feel overwhelmed at the prospect of adding dog holes to your workbench. It might seem a complex task involving complicated measurements. However, once you have an idea of how to do it, with a bit of planning, it is a simple drilling task.
The Layout
Planning your layout is the most critical part of adding dog holes to your workbench. You only have one workbench, so you would like to avoid mistakes that could spoil the look of your workbench.
Start by considering the tasks that you expect to do. Which are the tasks that will involve using dog holes and bench dogs? Although you are likely standing over the full length of your workbench, having dog holes at either edge can be useful.
Once you have a rough idea about where you want your dog holes and how many, try putting it onto paper. Draw a diagram of your workbench featuring the dog holes. You can even draw it to scale for better understanding.
By drawing a diagram, you will get a clear idea of how many dog holes you can add – you might have room for 20 or fewer if your workbench is smaller.
Once you have completed your diagram, transfer the markings for the dog holes onto your workbench. It will give you a clear picture of the layout of your bench dogs. Before you start drilling holes, take a long look at the placement of your hole markings.
Do not be hasty in drilling because once done, you cannot reverse it. Spend a day or even a week picturing your work with dog holes and bench dogs in their designated locations on your workbench. During this period, you can make a few amendments.
Drilling Your Dog Holes

Once you are sure that the dog holes are positioned precisely where you want them in the diagram, you can start drilling.
Remember, dog holes need to be perpendicular to the surface of the workbench. Ensure that your drill bit is positioned at 90° before you proceed with drilling. A deviation of two to three degrees is acceptable.
The top part of each hold needs to be slightly oversized than the rest of the hole. You can do this by filing the top part of the hole with a rasp. The slight taper enables you to wedge the bench dogs into the hole for a better grip.
Another good practice is to chamfer the edges of your dog holes. It helps to reduce wear and tear around the edges. It also helps to enhance the life of your bench dogs and enables them to work better.
When marking and drilling dog holes, space them from center to center. Spacing dog holes three inches apart makes a reasonable layout. This arrangement allows you to place medium-sized projects side-by-side. It also makes it possible to space your holdfasts sufficiently for larger projects.
Make a Dog Hole Jig
For maximum accuracy, while drilling your dog holes it is preferable to make a jig. Your dog hole jig can be simple or more complicated as the job requires. You can simply use planks to guide your hand while your dog holes. Or you may want to make it more detailed.
Planing Vise Dog Holes Placement

The first item on the agenda when you create your dog holes plan is the placement of your planing vise. You can consider this as the starting point for the remaining holes. The position of the remaining holes depends on the placement of your planing vise dog holes.
Ensure that you place a few dog holes towards the edge of your workbench. Sometimes, you will find that you must work with your body close to the workpiece like during planing. Having dog holes towards the edge of the worktable helps here.
According to experts, the first two holes should be two inches from the front edge and the same distance from the right or left edge. It depends on which your dominant hand is.
If you are righthanded, you will use a planer in a leftward motion, your dog holes need to be located on the left-hand side. If you are left-handed, then the holes will be located in the reverse.
Extra Dog Holes
Once you drill your planing vise dog holes, there will be two holes placed close to each other. Use the top hole for an entire row of dog holes across the length of the workbench. You can also add a few along the bottom.
Keep your dog hole diagram handy. Even if you have decided how many dog holes to add to your workbench, there is no compulsion to drill all of them at once. You can start by adding four to five dog holes, or perhaps more if your workbench is large.
As you start working on your workbench and using your dog holes and bench dogs, you can get a clearer picture of the exact location and number of dog holes you require. You can add more once you see where they will be the most useful.
Conclusion

Dog holes provide you with a quick and easy clamping solution to hold your workpieces while you work on them. The placement of dog holes is critical but don’t get too concerned as to whether you are doing it right. If your dog holes and bench dogs work well for you, then it is right.
If you have previous experience of using a vise extensively, then you might find using bench dogs a bit cumbersome, to begin with, but on starting using your dog holes and bench dogs regularly, you will wonder why you never installed them earlier! We hope that we have satisfactorily answered your question, “Why do woodworking benches have holes?”
We have also provided you with a lot of additional information related to dog holes and bench dogs that will help you to have a better woodworking experience when you use them to your benefit every day while at your woodworking tasks.