An angle finder tool is a helpful device for measuring an angle in a woodworking project. Many woodworkers know the name but aren’t very sure of how to use it. You can get several tools with presets to help you cut at 90° and 45° angles. However, if you need to measure an unknown angle of an existing item, how do you do it? An angle finder will help you in such a scenario.
An angle finder tool helps measure inside and outside angles. The adjustable leg holds an angle between 0° and 90°allowing you to repeatedly mark and guide a circular saw for making a series of angled crosscuts.
Now, no more of those ugly cutting mistakes. The old saying “measure twice” still applies to woodworking. An angle tool will give you enhanced accuracy, especially if you are doing repetitive operations that involve cutting and joining pieces of wood at an angle. In this post, we take a close look at the various steps involved in using an angle finder tool.
How to Use an Angle Finder Tool?

An angle finder helps you find angles, mark up lines for cutting, and even serves as a crosscut guide to keeping your saw straight. There is a 180° head that rotates and locks the ruler at a particular angle or reads off the precise angle of an existing bevel. Sounds complicated? Not at all! Using an angle finder tool is quite simple. So, let’s get right into it!
Step 1: Place the Angle Finder Tool on the Project
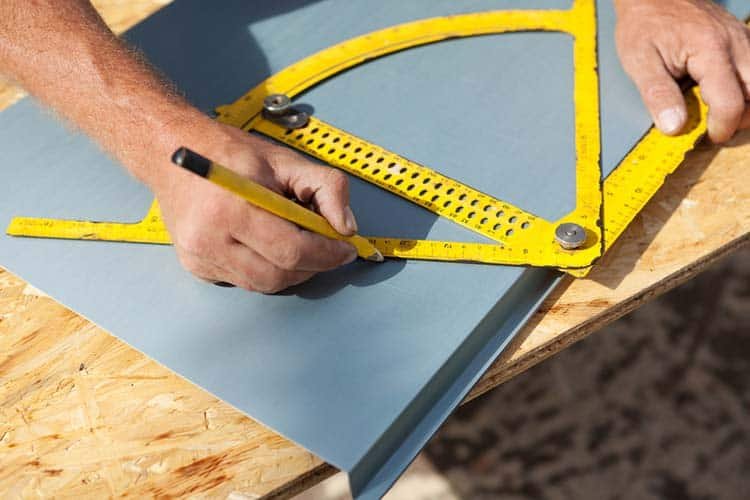
Place the angle finder tool on the location where you want to measure. There are different forms and shapes of angle finder tools, but they all serve the same purpose. Although some may look different from each other, they move in the same way.
Step 2: Take Measurements

You can use the tool to locate the exact angle you want to cut and how you will do so. Alternatively, you can use the tool to measure an existing angle.
Step 3: Locking the Arm in PLace
Whatever your purpose, once done, lock the arm in place. Most angle finder tools have a locking system to hold them in position. No more taking measurements with shaky hands. This locking feature of an angle finder tool makes the process of measurement an easy one.
Angle Finder Tool: Manual vs. Digital

Deciding between a digital or a manual angle finder tool is determined by your personal preference. You may be more comfortable with the traditional method of reading and measuring numbers on a ruler. Then, you will be more at home with a manual angle finder tool.
However, with the modern version, you just have to read the numbers on a digital screen. You can get reasonable accuracy from both types. However, digital angle finder tools are more expensive than manual ones and are easier to use.
Calibration of a Digital Angle Finder

In case you decide to buy a digital angle finder, you can look forward to much easier angle reading and cutting work. But initially, you may feel the need to calibrate it. Given below are the simple steps that show you how to calibrate your digital angle finder tool.
Step 1

Use a carpenter square for calibrating your digital angle finder. The three edges that it has been one of 90° and two of 45° each.
Step 2
Placing the square on the plane’s surface, set the angle finder on one side. Once the two arms are positioned, press the “zero” button that sets the reading to zero.
Step 3
Move the arms and match them until you see “45°” on the screen. If you press the reset button again, your test is complete, and your digital angle finder is calibrated. You can cross-check the accuracy if you calculate the correct angle of the square.
Most digital angle finders have a calibration button, which makes it easier to calibrate. It basically involves placing the digital angle finder tool on a known angle and pressing the calibrate button on the two locations of the angle.
Choosing a Suitable Angle Finder Tool

Now that you know how to use an angle finder tool, you would probably be interested in choosing a suitable one. Like selecting other woodworking tools, even in this case, you need to consider certain factors. Here’s what you need to look out for:
Accuracy
Because it is a tool for measuring, you would want to have it as accurate as possible. If you are working on a woodworking project where you need precise marking and measurement, you need a precise tool. Get details about the level of accuracy of the model that you are considering buying.
Lower and Upper Range
The maximum upper angle that you can get in an angle finder tool is 360°. You need the maximum number of angles possible in an angle finder to get the best use out of it. Thus, you always need to consider the lower and upper range of angles while selecting an angle finder.
Manual vs. Digital

This is a significant factor to consider while deciding on which type of angle finder to buy. You need to determine if you are comfortable with a manual or a digital type of angle finder. Budget constraints may cause you to choose a manual type initially, and perhaps you can upgrade to a digital one later.
Calibration

If you have a digital angle finder, you will probably need to calibrate it for maximum accuracy. Ensure that the tool can be calibrated quickly. You can find out about this aspect of a particular angle finder model’s performance by reading reviews posted online by verified customers who used the product.
Battery Life
Nothing is more annoying than constantly replacing the batteries of devices. A digital angle finder that needs its batteries changed frequently will hamper your usage of the tool.
Display
")
The screen of a digital angle finder tool should be easy to read. Take a good look at the figures to check that they are clear enough. Having a backlight is also an essential factor.
Conclusion
What type of angle finder are you most comfortable with? How are you going to choose a suitable one for yourself? Now that you are acquainted with how to calibrate and use an angle finder tool, you will probably want to procure one for yourself. Once you have a suitable angle finder tool, you will find it an indispensable part of your arsenal of woodworking tools.